Showing posts with label vacation albums. Show all posts

Wednesday, August 23, 2017

Vacation albums: Glacier N.P.

In addition to scrapbooking mini albums this summer, I've strived to catch up with my vacation albums. Including Hawaii, I have four to do, so I started with the oldest: 2013's trip to Glacier National Park.

Like all of my vacation albums, I use one product line and the same basic layout throughout. This makes it quick and easy to fit many photos in and have it look nice. For this album, I had put aside years ago the Fancy Pants Designs collection Happy-Go-Lucky. I thought the aqua would look good with the Glacier photos, and the collection was filled with campers, which fit with our camping trip! Here's the album:


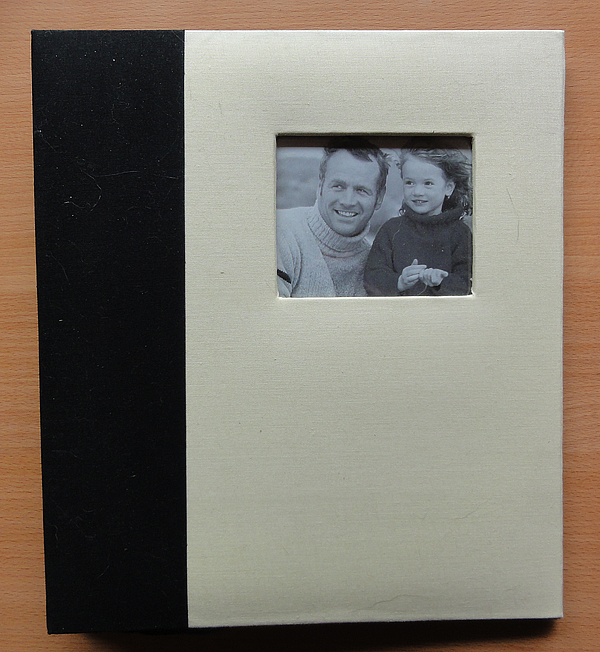
I always start my albums with my favorite family photo next to the title, then a cluster of embellishments next to the contents. The nice thing about Fancy Pants collections are the embellishments. They are various dimensions and layer beautifully because of that contrast.

I used a lot of those chunky in this album, so I had trouble photographing it--it wouldn't lie flat, and photographed unevenly. I mention that because the following photographs include the background, which I don't usually do. Sigh. Oh well.


The basic layout in the body is similar to the title page: strips of patterned paper dividing the title and journaling, plus some photos next to each. The following page is a PSE collage with several photos, pays some embellishments. I switch up the papers and embellishments on each spread.


A couple layouts had too many photos for two pages, so I made a four-page spread with three pages of photo collages.


When I make a title, I usually stamp or die cut it (not enough stickers otherwise). Here I used my Cameo to die cut using the font Grand Hotel. If it was long enough, I also used some small stickers from the Happy-Go-Lucky collection.


The final page is usually titled Looking Back, and I try to reflect on the whole journey, maybe with some photos of my family from behind. When something interesting happens on the way back, though, I record that, like when we got a flat tire the next year. Here we drove through a forest fire, which is sadly not too unusual in the West in the summer.

Thank you for letting me share my album! I hope this gives you ideas to speed up your scrapbooking process while also making the album attractive.
SaveSave

Monday, December 12, 2016

Scrapbooking vacation stories: Five vacation faves

Last summer my family visited New York and Maine. For once, I didn't make the Five Vacation Favorites album right away. I'm sort of glad because now that it's REALLY cold out, I like revisiting the warmth of summer.


I had gotten this camper mini-albums years ago at an October Afternoon sale, so I decided to finally use it. I painted the outside covers, then used the already die cut inside pages for the album.


I keep an Iris container filled with camping supplies, so I dug into it to find some products that would go. I used mostly chipboard and stickers from October Afternoon's camping line.


Some of us in our family had such fun, they couldn't restrict themselves to just five favorites.


I didn't take a photo of just me this vacation, so I used a photo of my mom and me. I like that even more. We're in front  of the giant LLBean boot at Bean's in Freeport.


Another one who didn't restrict himself to five faves!


And that's our vacation album of our favorites. I'm so happy to make this album every year, and I look forward to collecting these mini stories after we go.

Friday, July 22, 2016

Vacation album: pocket pages

A few days ago I wrote about a vacation from 2011 that I FINALLY scrapbooked and put in an album. That was the typical way of doing it for me. The next album I had to make was a weeklong-trip to Itasca State Park in Minnesota, not as lengthy as our typical vacations. as a result, I decided to try something new and do a pocket album. This is REALLY new for me--I've never done a whole pocket album--and here is the result:

I started by selecting my products, mostly The Great Outdoors Project Life set of cards, plus digging into my Camping bucket of supplies. The I selected the album, a 6x8 Daily Flash Album by October Afternoon. I went through the different pocket protectors to see the options, then planned the pages according to how many photos I had of each event. If I took a lot of photos, I used a page protector with more space. Here's a sketch of my planning:


And here's the album:


Like most vacation albums I make, my first page is a title page and table of content. Unlike most albums I make, my title was a photo of the State Park sign, and I handwrote the journaling, including the contents.


This album I did a little different from my usual album: I didn't use the same products for the title each time. Since Project Life cards are rounded, I tended to round the corners of what backed them and some of the photos, but not always. If there were odd shaped pockets, I tended to fit them with patterned paper from the same line From Pebbles called Lakeside, my favorite camping line ever.


Hiking was the big story, so I did a 4-page layout.

One thing I learned about these small photos: you need to pick something with a noticeable subject for them. I think I did this for the most part, but the prints turned out a little dark, so some shots are a bit harder to see than I would prefer.


One thing I learned: Measure the pockets! Not all are the exact size they seem. For example, the big photo sleeves are a bit bigger than 6x8. I sized all photos  (excepting 4x6's) on standard-sized templates using Photoshop Elements. I just had to do bigger than 6x8 for the big ones. I put those on an 8x10 print.


I like using dimensional accents on my pages, but I couldn't do that too much in this album. My embellishments served purposes on some of the photos: this tree crest, for example, covers garbage cans, and the label cluster on the previous photo covers a lady's bottom. Here's the rest of the pages:


Some of the smaller pockets I filled with patterned paper. Others I trimmed up Project Life cards and rounded the corners.


Again, my typical final page on the back cover, using an envelope to store maps and other memorabilia. I added a sticker on dimensional just because.

Thank you for coming back to see my more recent vacation album! I still have two vacations left to scrap, but I feel much better about finishing what I have left. I hope I gave you ideas from this project!

Wednesday, July 20, 2016

Vacation album: traditional scrapbook

Last summer I took a course at Simple Scrapper dedicated to finishing projects. I got a lot done, but I'm still working on it. This past summer I finished a 2010 Disney vacation album, and this spring I finished my 2011 South Dakota album. Here it is:


I used an 8.5x11 post bound album, my traditional choice. Also my traditional choice: I used one line (October Afternoon's Sasparilla) and I used the same design throughout the album: one page with a couple photos, title, and journaling, the other with a photo collage I made in Photoshop Elements (to see how I do this, watch this video I made showing how to do this). Here are the interior pages:


I start with a title/table of contents page. I tend to type my journaling and content, print in the same color as the background paper, then trim out and distress the edges. I also tend to use a family photo on this page.


If I have a lot of photos, I don't narrow it down: I make a 4-page layout like I did here.

(On a side note, it was a grown-up DREAM of mine to visit all these Laura Ingalls Wilder sites on this trip. Every winter I reread The Long Winter. Mad props to my husband for scheduling the trip so that we could do this.)


(Sorry for the bad photography--the pages are double sided and were so chunky that they wouldn't lie flat, so when I cropped then, occasionally I had to include the background.)

You'll notice that I print the photo collage smaller than 8.5x11--I think it's about 7x9.5? That leaves a white border of 1/4" that I trim, and then I mount it on a piece of cardstock 1/4" wider all around. This leaves 1/4" all around of the background paper. The piece of cardstock varies throughout the album--here green and blue. 


I tend not to use stickers for the titles throughout because there are not enough E's in the universe. I tend to stamp or die cut. Here I used my Cameo to cut titles using the Wacamoler font. It's free! (Autocorrect, I was not searching for Guacamole font, thankyouverymuch.) Here's the rest of the pages:


You'll notice at this point that I alternate the title and journaling location on the left side, which is on top and which is on bottom. I also come up with about three combos of papers on the left side that I alternate to vary the album a bit. I always like one big strip next to a couple skinny strips.


(That mule photo on the left with my husband in the rear view miter might be my favorite vacation picture ever.)

At the end, I sometimes run out of the background yardstick like I did here. Since scrap stores are so few, and I don't want to buy one sheet online, I tend to use the scraps from the paper trimming I did earlier in the album to piece it together around, not under, the collage. I did this on the above page.


On the last page I usually use a couple photos that didn't make it onto the other pages. At least one will include family members from behind. For me that's a little symbolic, sort of looking back on vacation. I don't always journal this page, but sometimes I pick a quotation that fits our trip. I didn't do that here.


Facing the last page is something I always do: I trim the flap off a big envelope, attach it with Super Sticky Tape, then put maps, postcards, and other memorabilia from the trip. (On a side note, these albums from Archiver's were my favorite vacation albums. I wish I'd bought 10. Sigh.)

Thank you for checking out my album! I hope it gave you ideas. I also did another vacation album this summer, this time a little differently. I'll post it later this week. If it's as hot tomorrow as it was today, I will not be stepping outside much.

Saturday, September 19, 2015

A dull scrapbooking post about altering page protectors

A bummer of a title,but I am super proud that I managed to make this work and I wanted to share it with you. Be warned, though: only pictures of page protectors--no pretty photos on this post!

I have mentioned before that I like to make my vacation albums 8.5x11 potbound. (Side note--my computer keeps changing "postbound" to "potbound." I hope I caught and edited all of them, but in case I missed one, please know I'm not referring to drugs!) Those albums are pretty hard to find nowadays. I LOVED the Stampin' Up! 8.5x11 postbound albums, but they discontinued them years ago. Sadly. As a substitute, I bought a few of these on clearance at Archiver's years ago:


I didn't buy any extra page protectors, though, which is something I've since learned: just like when I buy a stamp pad I always get the refill, now when I buy an album, I always get extra page protectors too.

In this case, I had used one album to scrap my Disney vacation. To scrap that vacation, which needed tons of page protectors, I raided the second album that I had bought for some of its page protectors, which left this album a little thin for the Custer State Park vacation I was going to use it for. When I checked my supplies, I had two different kinds of  page protectors:


On the left are Stampin' Up! extras--a lot of them--and on the right are the 4 leftover ones from the album itself. The problem?


When you lay them on top of each other, the album protectors are a hair shorter on the right than the SU ones. Damn. (On a side note, I just noticed that you can see me in the page protector--apparently I was wearing a purple shirt when I took this photo.) Since page protectors are pretty sturdy, I decided to be crafty and make the album page protectors a little longer on the right.

I had 4 album page protectors, but I only needed 2 for the album, so I cut the left edge off two and sewed them onto the other two, making them a little wider on the left:


After I did this and laid them on top of the SU page protectors, voila! It all lined up.


I suppose it didn't really matter that they didn't line up on the right, but I'm fairly type A and knew it would drive me crazy when I looked through the album. As a result, I decided it was worth the effort to try to even them up.

I did manage to edit and print the photos from this vacation before the summer was done, so I will be finished with this album within the next month. I'll share it once I'm done!