Showing posts with label scrapbooking process. Show all posts

Wednesday, September 6, 2017

Bulletin-board scrapbooking design

When I was in college, I had a bulletin board on which I kept various photos and mementos. Later I put the photos in frames, then albums, but I remember the process of putting down photos then filling in the gaps with stuff. I did that same thing recently with a few pages. First was a year-end review page I did for 2016:


I used several photos from the year. I split the page between two pieces of patterned paper, layered some on a Project Life card and used another for journaling, then used bits of Ali Edwards' kits to fill in the blanks. It works.

I did something similar with a page about my son's recent birthday:


The photos were different sized, which left some gaps when I put them on the page. I dug out some birthday themed stickers and some similarly hued embellishments to round out the page. I think this was mostly Crate Paper.


I adhered some elements, like the camera and frame, with pop dots for greater dimension.


With some stickers, I just layer them flat on top of each other.


As always, I like to stitch some stickers down, partly for decoration and partly for adhesive.

Thank you for visiting! I hope this gave you some ideas for fitting together oddly shaped photos. I'll be back with more pages I scrapped this summer later this week.

Monday, September 4, 2017

Scrapbooking with paper strips

I have trouble getting rid of paper strips. I keep my narrow strips in a spaghetti holder.


Every now and then, I like to use strips of paper to make up the bulk of the page. (When I make these pages, I call myself a stripper. Heh.) I did that with the following layout. I had an 8x12 photo, so I only had some narrow space at the top and bottom of the page, so I dug through my strips and picked them in three hues for contrast: blues, neutrals, and brights.


Blues alone were too blah, so I had to pick some colors for contrast.


And here's my final page:


After I selected my strips, I went through my stickers to find colors and shapes that would match and contrast. Some I stitched down for interest and practicality (some of my stickers only stick with hesitance).


Thank you for visiting! I will be sharing a couple pages I made recently with what I call bulletin-board scrapbooking later this week.

Monday, August 17, 2015

Finishing projects day 1: school mini-albums

Hello!The end of summer is around the corner, and I'll be starting a new year with a new teaching prep. My boys will also be in middle school, so I'm anticipating less free time, at least at first. As a result, I'm trying to finish as many projects as I can this summer.

I've actually accomplished quite a bit--I organized the garage, taped and speckled some wall holes in the house, and begun harvesting the garden and cooking (marinara, anyone?). Now here's a list of some of my scrapbooking projects I had to tackle:

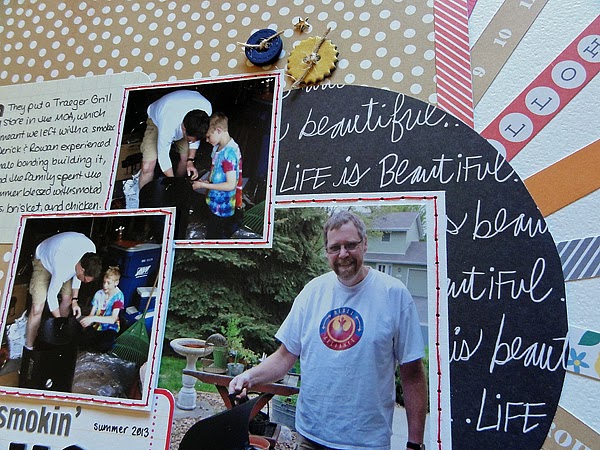
  1. Finish creating the boys' 5th and 6th grade school album pages
  2. Edit and print photos from Custer S.P. (2011)
  3. Create mini albums with thank you cards from school
  4. Finish the Disney album (2010)
  5. Update the Easter mini-album
  6. Complete the iScrap class/album
  7. Complete the Get Messy class/album
  8. Ask Derick to finish journaling his London album
  9. Complete 5 Vacation Faves (2015)
  10. Create cards for my Dad
  11. Rowan school album photos: 3rd, 5th, and 6th; class photo 4th and 6th
  12. Dominic school album photos: 2nd, 4th, and 5th;class photo 3rd and 5th
I'm on my way, as you can see. I completed three things on the list, and I'm within a day or two of finishing 3 more. As a motivational push for me, I am going to share my projects as I finish them. First, the mini albums: I had to clean out my office desk last spring at school since the area was being turned into new classrooms. I found 17 years of thank you notes in the desk and decided to make them into mini albums to keep them more solidly. Here they are:


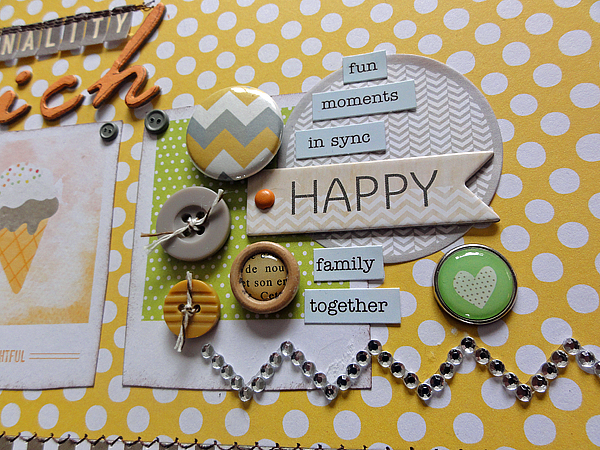
These first two mini albums include thank you notes given out for teacher's appreciation day. Students send them to teachers they want, so I kept the ones that were the most specific. Because they were the same size, they were easy to scrap I used some older Jillibean Soup kraft file folders to house them. For color, I lined the inside with some bright patterned paper (I dug into my scrap piles for them) and used a bunch of bright, non school accents.

Next are some actual cards.They were irregularly shaped, so a little more difficult to fit in mini albums. Here's what I did:


For these mini albums I did dig into my school themed Iris container for products. I pulled chipboard mini album covers from a 7gypsies mini album for the one on the left, covered it with paper using my 5-inch Xyron, and embellished the cover. The cards are not bound in there, by the way: the ribbon is holding it altogether.

On the right I wanted to use the Report card paper for the covers, so I trimmed some spare cardboard to fit, used the Xyron again to adhere, decorated and tied together with the ribbon like I did with the last album.

Finally, I needed something bigger for the actual letters and printed-emails I've collected through the years, so I used an actual manila folder:


Again, I lined the inside with patterned paper scraps, and for the outside, I dug into the school themed Iris container to finish decorating it. (Note: once I got to this point, I realized I had used basically the same design on each mini album. Different products, but same design. Huh.) Like I did with my first two mini-albums, I used a binder clip to close this. Easy-peasy!

Thank you for letting me share some of my projects! I'll share more this month as I complete them. I doubt I'll finish it all, but boy, will it feel good to empty out more project containers that I've been storing the half finished projects!

Saturday, January 17, 2015

Stuff on the table

I love to put lots of stuff on my pages. I mostly make use of the kits I get, plus digging into a basket in which I keep my most recent embellishments before I put them away into my stash files. Sometimes, though, I keep something on my scrap table (lap desk) for a while because it didn't make it onto a page, and I forget to put it away.

Eventually, though, these little embellishments start to bug me. I really should use them or put them away! At that point, I dedicate myself to putting them on the next page I make. No matter what.

Here's one of the earliest pages where I did that:


This was back when Simple Scrapbooks was still published and had a challenge blog. I think it might have been a challenge to use stuff lying around your table. See those strips and ribbon? They were on the table, along with the flowers, pins, and sequins. I love this page. The rub-on is Hambly--I think I still have some of those, and I did the cut out with my Coluzzle, which I still have and use. Sigh. *nostalgia!*

Lately, I had some wood veneer birds I thought about using on a page, but I never did. These birds stared at me as I scrapped until finally I put them on a page. Here it is:

(Sorry the color is a bit off. This was during dark December, and I had to tweak the lighting on my computer.)

I had made this page using up last bits of a fall kit. I had laid the vellum over cardstock, put the patterned paper on the bottom, used Project Life cards to frame the photo, and used wood to back the title. I then added the hearts and thought I needed more wood, but had no more hearts. And thus came the birds onto the page. It has nothing to do with birds, unless you think that there's two of them, and they represent my boys, but that's a stretch. They just look cute because they are wooden birds and they complement the other accents.

Here's some details:


Thank you for checking out my pages! If you haven't ever, try using something lying around on a page. It's fun sometimes to make it work!

Friday, October 18, 2013

Scrapbooking table scraps

I have this drawer by 7 gypsies on my side table where I scrap. In it I plunk every little bit that I am too lazy to find the original packaging for and put away. I also keep a spaghetti holder in my space in which I put every cute bottom border that I trim off but don't use. For the most part they just sit there and stare at me while I scrap, but occasionally I get serious and scrap these scraps.

Here's an example of one I did long ago:


I did this page long ago for a challenge for the Simple Scrapbooks blog to scrap bits on my space. I tend to be pretty meticulous and orderly, but I loved this look, and it inspired me to be a bit more random in my product choices every now and then. (Funny that this layout was so long ago, but my style is definitely showing itself here: cutouts from the photo, strips of stuff, and overlapping the photo.)

Recently I did something similar. Here's the result:


I did this page for The Art + Science of Scrapbooking at Big Picture Classes. The challenge was to pick an embellishment and design the page around it. I had long ago bought the HAPPY--it's my favorite color--but I had never used it, so I pulled it out, selected photos, then found happy paper to go with. The products were either in my tray or my new embellishments basket I keep near me. In particular, the "summer note" die cut and the "picture perfect" acetate were just sitting right by me, so I put them on the page. Just because they were Happy. Here's a detail:


Soon after, I also scrapped some of those thin strips on a layout. A LOT of those thin strips. Here's the page:


I used a sketch from Simple Scrapper for this. Here it is in process when I was working on it at Archiver's with some girlfriends last weekend:


I pulled every strip I had in a leftover Studio Calico kit and lay them down in a sunburst. I didn't think to make them all matchy-matchy--I just used what I had. Then I glued them down and trimmed the edges. The hardest part was not spelling a swear word with the strip that spelled "Hello." (Heh.) Here's some details:


This was pretty funny: I needed a small grid card for journaling, but I'd left my Project Life kit at home. My friend Janet had a mini-set of religious Project Life cards, so I looked through them and found this one that said "Blessed." Since I DO feel blessed now that Derick has been smoking all summer, it was a perfect match for the page, and it made me laugh to boot. Another instance of scrapping what's on hand.


So this is how I scrap what's lying around on my table! The look on my pages is a bit more eclectic than I normally produce, but I like it, it uses up supplies I have, and it's fun. Thank you for looking at my process!

Wednesday, June 26, 2013

Using patterned paper with bigger patterns

Of the four Fancy Pants Designs collections I've been using these past three months--Swagger, Trendsetter, Park Bench, and Down By the Shore--my favorite is probably Down by the Shore. But I have been hoarding that collection shamelessly. Why? Last summer I went to Maine, and I want to use it for my vacation album, which I'm still editing photos for. More to come on that vacation album next week.

I couldn't wait any longer to use it, so I took some photos of my boys at the local pool and pulled out the collection. The best paper to use for the pictures was one called Whale:


The main side has a pretty big pattern. I tend towards smaller pattern, so it was a challenge to use. Here's what I did:


As you can see, I printed the photos smaller, 4x4 and 2.5x2.5. That made it easier to put them into a constricted space to the right of the whale and the flourishes.

To balance out the flourishes on the bottoms, I added some rub-on flourishes to the upper right.

Supplies:
Fancy Pants Designs Down by the Shore collection: Patterned paper: Whale, Strips, Saltwater, Striped Towel; Rub-ons; Sticker Fundamentals

Here's some details:


To add a smidge more color, I used strips of patterned paper plus the banner stickers, which remind me of the banners on the ceiling of the lap pool. And for fun, I added a deep blue rub-on to the whale spout.


To add more texture to the flourishes, I put gold gems randomly throughout. Think of them as sparkles on the waves.

Thank you for sharing my page! Tell me: Do you swim? If so, where?

Monday, August 13, 2012

The unpleasant experience of scrapping holidays

I know the title sounds a little gloomy, but I think it's a dirty little secret in scrapbooking, at least for me: scrapping the holidays does not enthuse me in the slightest. Those things that happen every year-- Easter, Christmas, birthdays, etc.--just feel like the same thing every year. The same products, the same photos. Bleh.

Still, I'm trying to break through. For one thing, my boys LOVE the holiday pages. So one solution I tend to do with the holidays is making pages for their albums.

I also have been trying to create pages without the typical themed product. Here's one I just did for Dominic's birthday:


It's not his party--I still haven't scrapped that--but I LOVE these photos. He's just so absolutely delighted that my aunt made him a cupcake and we're singing him Happy Birthday. I used Studio Calico's kit So Cal rather than using birthday papers.

Here's some details:


There's something celebratory and happy about the papers and embellishments, but it doesn't look too much like a birthday cake. Well, maybe a little.

I also did something similar with Easter this year. I took the typical egg and basket photos, but what stood out for me the most was the fact that I had to threaten to eat their chocolate bunny ears to get a good photo. So that's my page.


(Just a quick product note: I found that stamp ink pads and a sponge work better on these Heidi Swapp mistable letters than mist, which runs. Go figure.)

Again, no bunnies or eggs in sight on the product. (I have issues with Easter or spring lines in general. Spring in Minnesota looks NOTHING like that. It's actually kind of brown here. Certainly not pastel.) I used Studio Calico's 35MM for this one. (I'm a little behind on using my kits, in case you can't tell, LOL! Hopefully I'll be finished with all but one by the end of the summer. Right now I've got three I'm using.) The camera images seemed especially appropriate.

So thank you for reading about what I loathe to scrap and how I deal and scrap anyway. Now tell me this: how do you feel about scrapping the holidays? :-)

Sunday, April 29, 2012

Something I never do...

But I did it with this layout.

I wanted to make a page about my son's penchant for riding his bike up to the water tower. He calls it his "Quiet Place." Lately, he's also started climbing a tree in our backyard, calling it his "Happy Place." With that, I took photos of the water tower, then of him in the tree, printed them, and made a page. This was the page that killed my January Studio Calico kit County Fair, the 18th page from the kit. (I got a few add-ons with that kit. I loved it.)

Inspired by the cute tree paper by Jillibean Soup, I cut the photos into circles. Here's the finished page:


Only...look at it. It doesn't really look right, does it?

I struggled to figure out what was wrong, finally settling on the photos. Was it the color? Should I print them in black and white? No, that wasn't it. The problem was the photos themselves, especially the left one. It looks great as a 4x6, but cut like it is, you don't get the real place that is Rowan's quiet place, right at the foot of the tower. I also had issues with the one on the right too. Too much tree, not enough yard. (And a clear idea of how high up he was!)

So here's what I did that I've never done before: I replaced the photos on this page. I went out again, took photos again, this time with more of the surroundings visible, reprinted them at National Camera Exchange with what was doubtless their smallest order of the day, and made this, the real finished page:


Doesn't it look so much better? Here's some details:

I misted the January kit's wood veneer letters with Mister Huey Sunshine. Can I tell you how happy I was to use a Q?

  
A close up of the new photos. I sanded the edge of them, something I like to do when photos are sitting on busy paper. It's like a thin, rough white photo mat. I used my ancient Coluzzle to cut the circles.

The journaling spot I cut from the sticky notes that came with the kit. I mounted it on white cardstock to make it less transparent.

The bottom map paper was cut with a punch that I may well have used up. It always gives me a rough edge, no matter if I use my punch sharpening kit or not. To mask the roughness, I use my distressing tool on it to make it worse. 

Thanks for taking the time to look at my process and my page! What's something you've never done when scrapbooking?

Thursday, March 8, 2012

I'm a detail gal

What can I say? I'm a detail gal. My colleague described me perfectly. He's a big picture person, so he'll compose a document putting together the whole plan for the paper unit, and I'm the one who asks, "What does #3 mean?"

That habit translates into scrapbooking too. Designing the page comes quickly for me; depending on the photos and story, the orientation tends to fit together best in only a few ways. There I'm not so creative.

Once I build the foundation, I go to town with the details. Being a relatively linear and simple gal, I don't like the details to overwhelm the page, but I do like them to be eye catching and to invite the viewer in to look again and closer. Here's the latest page where I did that:


I did this page for the Big Picture class Twelve. I didn't include the bigger photo of my boys on the camping LO I made, so I pulled older personality shots of the boys and put them altogether on this page to write about how they are rich in personality.

Here's some of the details I love and add to page after page:


1. Misting. Here I just did light sprays of Studio Calico Mister Huey Clover and Lemonade.


2. Layered border punches. I got the idea for the staggered layering from this pin on Pinterest.


3. Label stamps to identify photo locations. I tend to do this on multiphoto pages, of which I do a lot. These stamps I got in a kit from Studio Calico a long time ago. I use this punch by EK Success for them.


4. Stitched photo corners. This is a quick and easy WOW to add to pages. Lay down a ruler and punch holes every 1/4 inch. Then backstitch using three strands of DMC. 


5. Journaling strips. I space the journaling 1.5, then trim them and adhere them. I usually outline, though in this case I misted then inked the edges.


6. Stitched title in two different fonts.  Make sure you machine stitch before adhering the chunky accents. (The dog hair is an unintended detail.)


7. Cluster of small embellishments, usually on a larger paper base. That's what stash is for. (By the way, note the damaged paper where I removed then reapplied the gem zigzag. Oops.)

So there's a few of my favorite details. What are some of your favorites that you like to add to a page for a little somethin' somethin'?