Showing posts with label PSE. Show all posts

Wednesday, January 29, 2014

Year-in-review pages

The other day I showed you my One Little Word Page Do. I use that page to set my goals for the year.(To make sure I keep that in mind, I put it up on my wall.) Today I'd like to share with you two ways I record the year in review.


This first page is what I do at the end of the year with my One Little Word. I reflect on how it impacted my year. My word--CHERISH--overall taught me to look for blessings in places that they were hard to find, so I let that guide my journaling.

Some of what I journal about here I thought about and did along the way, but other things I journaled are my perception at the end of the year as I reflect. Our life stories are events and our feelings and perceptions about that events, so looking at the year through the lens of my word gives that year meaning to me.


Another way I scrap the year is to select my nine favorite photos from the year and put them on a page together. I do the same design every year, using a template I downloaded years ago, then lost and recreated myself using PSE. It's challenging narrowing down to nine photos, but I scroll through PSE Organizer, opening every photo that strikes me, and going from there. It's tricky focusing only on the photo, not the event, but when I do, the selection process is easier.

Thanks for checking out my pages! I hope you get inspired to reflect on the year and scrap it.

Monday, September 9, 2013

How I photograph my pages

When I did a week-long blog for Write Click Scrapbook this year on two-page layouts, one commenter asked me how I photographed my pages. This summer I asked my son, the intrepid techie, to take pictures of me while I took pictures of my page. (pardon the blur on the photos--the shots were good but I saved the photos too large for what I should've from a phone. Oops.) Here's the scoop, in all its steps:

1. I place my page on an ottoman near a west-facing window not near the end of day to photograph it.


I have almost no windows in my house, really, so I must photograph the page before it gets too late and the light too intense. I could place the page on the floor, but I'm a fairly tall woman, so I can get closer when I place it on something. I like the ottoman because it is about 2 feet off the ground: not too high, not too low, with a neutral navy background.

2. I stand directly over it and photograph it.


This is the important step. I have to hold my arms steady at my side and move the camera until the layout is about square in my screen. I then take a couple shots.
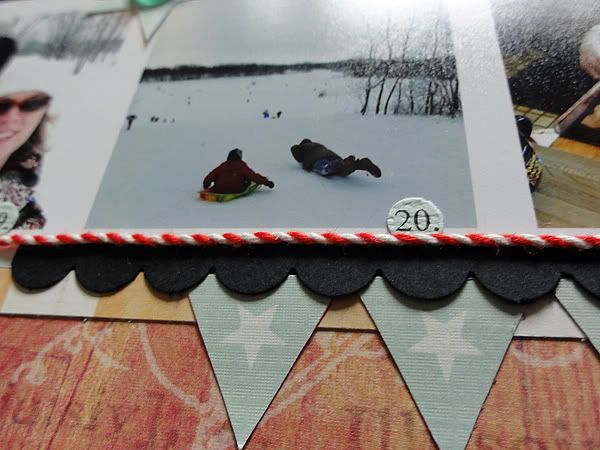
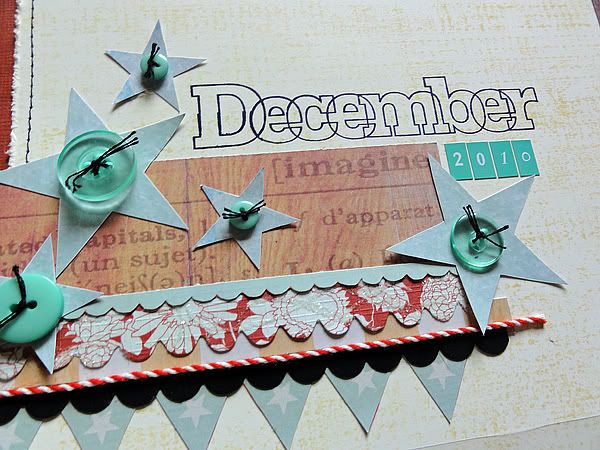
3. I get down close to take some details shots.


This is harder for me to hold the camera steady. I could kneel to get closer, but I don't have great knees (many sprains from high school field hockey and torn cartilage from volleyball) so I stand.

4. I fix up the shot in PSE 10 afterwards.

I'll share what I do step by step here:
  • If the image is crooked, I straighten it (Image-Rotate-Custom-.5 degrees right or left is usually enough to tweak it a little).
  • I crop the photo, unrestricted, to eliminate all background.
  • I usually do an Auto Smart Fix under the Enhance menu. Like I said, I tend to have bad light.
  • If the page is for a design team, I use the required template. If not, I skip this step and move on to the next.
  • The next step is to sharpen the image (if it's on a template, I flatten the image first.) I go to Enhance-Sharpness to do so. I usually keep it set to 85% for an Amount and .8 Radius in pixels. That seems to sharpen the photo nicely without getting too sharp.
  • Then I Save As in a file folder--my Fancy Pants Designs pages get stored in a different folder  from my personal pages.
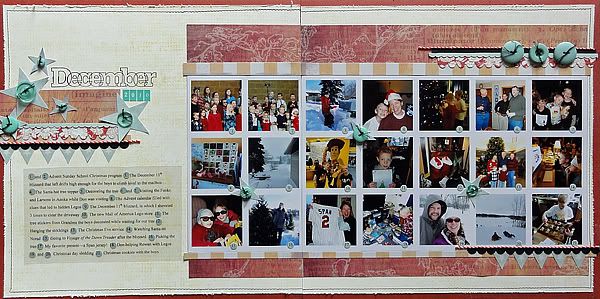
And here's how the page above turned out when all was finished:


And that's how I shoot and edit my photos to get them ready to put online! Thanks for reading about my process. Let me know if you have any questions--or share your process so people (like me!) can improve their process.

Saturday, December 17, 2011

Muted Christmas hues

A holiday confession:

I really don't love scrapbooking Christmas.

There! Off my chest! My month is so packed, I can't even begin to think about December Daily, and scrapbooking with traditional colors makes me never want to look at anything red or green again.

But this combo of colors makes me want to scrapbook the holidays:


See how subdued they are? Classy and fresh!

To get over my dread of making innumerable layouts from December, I used PSE 7 to make a collage that captured the entire month of December 2010:


I used black and mint for accent colors and depended on the light orange and cranberry red for the main hues.


I couldn't find a cardstock hue in just the right orange, so I created my own with a texture wheel and a light orange ink.


I wasn't much for extensive journaling, so I made a list and printed on a transparency to make the stamped background paper visible. To make the numbers stand out more, I punched mint circles from cardstock and set them under the numbers.

Here's the GCD Studios products I used:


Spring in Bloom Tags, Ribbons, and Mosaics


Funhouse Coney Island


Funhouse Shooting Gallery (I hand cut the mint-green stars from this paper.)


Funhouse The World's Greatest (I also hand-cut this one, the mint green banners this time.)


Funhouse Ribbon Spool (The red and white striped twine is like a candy cane!)


Die cut borders from Homespun Chic

Have fun experimenting with a subdued version of the traditional colors!

Wednesday, August 25, 2010

Club CK Blog Hop!

Welcome to the “Goodbye Summer, Hello Fall!” Blog Hop, hosted by a talented group of ladies from Club CK. If you did not arrive here from Amy Chretin's blog, please go to the beginning of the hop at Virtually Froggy and follow the blog hop in order. By following the blog hop from beginning to end you will collect words to a secret phrase which will make you eligible for the grand prize. The details for grand-prize entry are posted at the start of the blog hop. You won't want to miss it!

Here's the project I did to memorialize the end of summer:

We had a perfect summer day yesterday, sunny but not too hot, a nice breeze, and a day at the local playground with friends. The corn in the background really is as high as an elephant's eye, which means it's time for fall.

I used my August Studio Calico kit called Summer Camp for it. I also played around with PSE 7 and made a template for all the photos. I left two spots blank and put the patterned paper there. I SO wanted to stitch but ran out of time. Thank goodness for pens.

Thank you for coming to my blog! The secret word is WAVE. Now hop on over to Annie's blog for your final clue!