Showing posts with label Cameo. Show all posts

Friday, September 8, 2017

Ombre stitching on a scrapbook layout

The September sketches at Simple Scrapper are truly inspiring. After I made my pages for the magazine this month, I made another one based off another sketch, a page about my older boy's favorites from Hawaii. The sketch had a repeated title, and since this was about Hawaii, I decided to make the title ALOHA. And since rainbows were so frequent and symbolize Hawaii, I decided to make a rainbow stitched title.

For more interest, I decided to make the stitched title ombre, with the most intense colors at the top and the least intense at the bottom, sort of like the background patterned paper. I started by selecting rainbow DMC in three intensities:


Next, I cut the title in a blocky font on my Cameo and used the negative space to trace the title across the page.


After this, I used my paper piercer and foam pad to punch holes for stitching. I eyeballed it, but the holes are about 1/4 inch apart. When the letter went under a photo, I made the hole be at the edge of the photo.


To stitch, I did some estimates first: I figured that I would have about 3/4 of a letter for each color. I stitched the brightest first, and that served as a template for the rest of the stitching. Where I shifted into a new color in my first title, I did the same with the same colors on the rest of the page. Here's the final:


I used some Kelly Purkey label stamps in bright colors around the page along with some leftover Primas I have to embellish. Not too much was needed after the titles.


I never used the medium purple since the final A was always covered up!


Thank you for visiting! This was somewhat labor intensive, but it was fun to do while I watched TV, so I hope it inspired you to do some stitching on your pages.

Monday, May 26, 2014

Scrapbooking a rainbow

Another page I worked on in the month of May: a long-planned page about my son's love of the Rainbow Loom.

I'd planned many more photos, but I finally decided to cut it down to one representative photo of each part of the loom: the planning (looking at videos on Pinterest), the creating (sitting in Caribou Coffee with me and weaving), and wearing his creations (and looking like an indie rock star). Here's the page:


I used a sketch from Simple Scrapper that I took many liberties with. I changed the shaped to be circles and added photos in the general vicinity of the sketch.  I also loved using rainbow colored paper that I got with my March Studio Calico kit and stitching rainbow circles.

The trickiest part: die cutting the title on the background paper with my Cameo. I laid down the papers and photos where I wanted them, then attached it to the sticky mat, cut--then ruined the paper peeling it off. #&$@! I used a less sticky mat and it worked better. I still got some warping of the page in the corners, so to take the picture I added adhesive to the page and stuck it on the ottoman that I take my pictures on. Here's some details:


In case you are wondering, the M is a different set of Thickers. I ran out of the kind from the kit and delved into my stash for something similar.


Thank you for checking out my page! Rainbow Loom was such a big thing this year, I hope my son loves looking back on this page in the future.

Saturday, October 26, 2013

Happy birthday, Padawan

We celebrated the birthday of my eldest yesterday. It was his 11th, so we joke that alas, he is a muggle since he didn't get his owl for Hogwarts (bonus geek points to you if you get that!). We plenty of geeky things in place of the owl, including our traditional birthday outing to Space Aliens for dinner.

Here is a recent layout I did celebrating my eldest:


A few years ago I bought Star Wars Crafts on Black Friday at the Mall of America. Since then I've made crafts for both boys, but Rowan is particular is obsessed with them, especially the stuffed animals. I made a tooka doll, and my mom made him a washcloth wampa. Later he asked for a bantha; I needed a model so he built one out of cardboard for me. I put this page together to remember this phase in his life, just in case he outgrows his love of all things cuddly Star Wars.

Here's some details:


Amazingly, when I planned this page, I forgot to  print a picture of the FIRST Star Wars craft. I had already made the page when I realized this, so I printed it small and tucked it under one of the two. I numbered the photos to assist the story, since the photos are out of order.


The title I cut on my Cameo using Baronesse font, I think. It's a little retro, which is nice for Star Wars. And stitching through the middle of chevron? Love it.


I was near the end of my Studio Calico August kit with this page, so I cobbled together a title with all the alphas I had left. It looks a little crafty as a result, which I liked.


The journaling I added as strips, inking the edges a bit in blue.

Thank you for checking out my page! This past week was busy with birthday planning for us, so next week will see more blog updates. And in the next couple weeks I plan a giveaway!

Sunday, September 29, 2013

Scrapping two random photos

I just finished a week where I had to write comments on about 100 papers in about 4 days. I didn't scrap much this week. :-) Once the weekend came, I finished some pages I'd started a week ago. One page in particular has become one of my favorites. (Isn't that always the case--whatever I just finish becomes my new favorite, LOL!)

In the Big Picture Classes class The Art + Science of Scrapbooking, a right brained challenge was pretty intriguing: pick a recent photo, rearrange the numbers randomly, then pick a photo on that date to pair with the first and inspire a unique story. Here's what I did:


The recent photo is one of my favorites: my boys in the same chair at the library, reading the same book. *sigh* The photo I found was my son "reading" the Sunday paper circulars a few months left before he would become an older brother. And my story was born. I used Fancy Pants Designs Collecting Moments for the page, mainly because of all the time and number related products. Here's the details:


I selected stickers and flair with phrases that seemed to fit the story.


I double cut the title in two colors, layered them on top of one another, stitched the center, then curled up the top and bottom. I got that idea from Celine Navarro.


If you look to the right, you can see I punched the chalk tape into a scallop border. It's not hard to do if you are careful to line it up right.

Thank you for checking into my page! The inspiration behind it was pretty unusual for me. Have you ever done anything like it to create a page?

Thursday, September 5, 2013

Numbers and experiments and maps

My week of blogging at Write Click Scrapbook is almost up. I had a lot of fun sharing inspiration  from school subjects, and I hope you get a chance to go over, read, and make note of your ideas!

Here are a few pages from the last few days. First, math:


I used an equation to journal what made up this super fun, amazing summer. The details:


The title block is my favorite part of the page. I layered photo overlays, then chipboard frames, then the title, which I cut from the Cameo and outlined. I love the dimension.

Here is one of my favorite pages from Science:


No experiments, but undersea animals and a cute story. Plus, the perfect paper.

Finally here is a page from my favorite day this week, Social Studies:


I loved using October Afternoon's Midway line with this page. It looked really good. Many jokes about that are on the tip of my tongue right now...

Thank you for stopping by! Go check out the inspiring pages at Write Click Scrapbook and have fun scrapping!

Friday, August 23, 2013

My own Calvin and Hobbes

When I was growing up, Calvin and Hobbes came out. I loved it. Such a funny cartoon about childhood in particular and life in general. My sons became obsessed with them a couple years ago, particularly Dominic. I still remember the email from his teacher the day he actually wrote "I cannot answer this math question because it is against my religion" on a test. Thankfully, that teacher had a great sense of humor. Later, I was happy to share an updated version of the comic with the boys called Hobbes and Bacon which envisions Calvin and Susie married with a daughter named Bacon.

The boys have read every Calvin and Hobbes book, so their interest has waned lately in favor of Wimpy Kid, Big Nate, and the Middle School books. Still, my boys tend to channel some of Calvin's wildness, to the sometime agony of their mother, so I see Calvin's hijinks in their daily play.

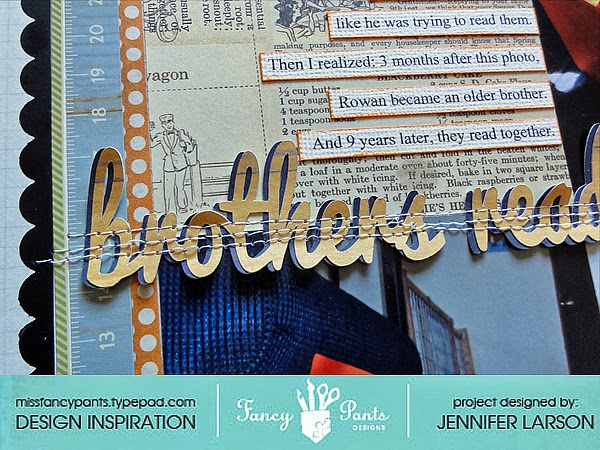
One such occasion happened last year. We were visiting Two Harbors to celebrate my grandmother's birthday, and the boys found a Radio Flyer wagon. They pulled it to the top of a hill and took turns pushing each other down it, barreling at high speeds. I remembered many images of Calvin and Hobbes flying down a hill in a sled or a wagon, so I made the following page to remember the connection:


I used 
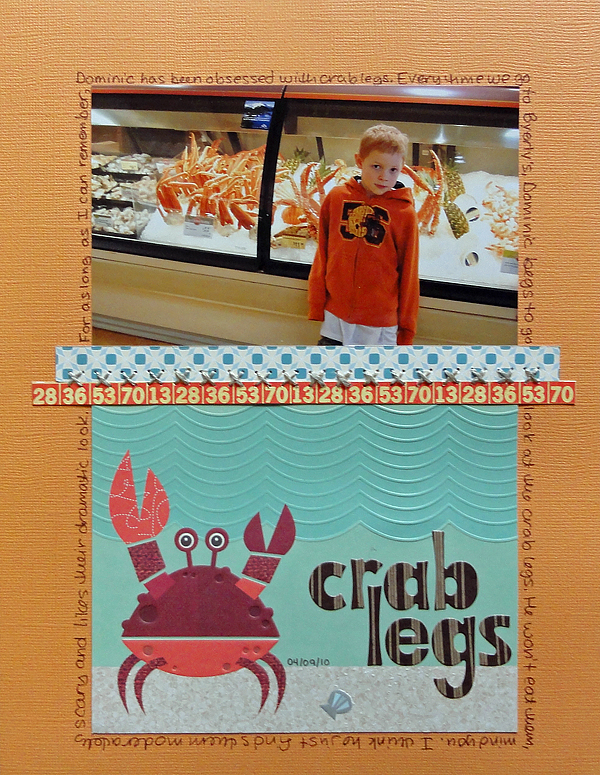
Fancy Pants Designs' Memories Captured line for this page, plus some cork stars and labels. I love how muted the colors are, which through contrast highlights their action in the photo. Here's some details:


I love the ephemera pack in this collection to do many of the clusters. This is my favorite embellishment of all time. It is so versatile! I bought another one at Archiver's today, I love it so much. I also used the decorative tags, decorative bags, buttons, flair, and sticker fundamentals. I love layering. So. Much. Fun.


I also like the chalk tape (you can see it a bit on the top). In particular, I like to punch it and adhere it to a border. For the most part it punches well, and I don't have to trim ragged edges. On this page I used the 1/2 inch chalk tape, plus the EK Success Bumpy Road punch, which I use a lot on my boys' pages because of the metaphorical significance. Heh.


I like working the title into the journaling. In this case I used my Cameo to cut the title. I have to admit, the Cameo makes it super easy to get just the right sized letters. I used the Pacifico font. I tried many, many fonts before settling on the font I probably use the most, sort of like how I almost always use Times New Roman for journaling, though to switch it up a bit, I used Avenir on this page. Kind of crazy, I know.

Thanks for looking at my page! Tell me, how big a Calvin fan were you?

Tuesday, July 30, 2013

Scrapbooking a vacation album

When I first started scrapbooking, I discovered that vacation photos were filling the family albums, so I started putting them in their own, separate album. For a couple years I struggled to complete them. I remember in particular the first Maine album, trying to come up with a colorful, innovative way to scrap the photos on each layout. Then epiphany: Why come up with a new design for each album, let alone each page? Thereafter, I started using the same design for each vacation album, only changing the products.

I am a bit behind in vacation albums. I haven't scrapped Disney (2010) or the Black Hills (2011), but excited by the Fancy Pants Designs collection Down by the Shore that came out in January, this summer I started scrapping our Maine vacation from 2012.

Here's what I did:


This is the title page. I use this page as a design template for the rest of the album: Big photo next to title, strips of patterned paper, then the contents and an embellishment cluster. Here's some details:


One of the great things about Fancy Pants designs are the B sides, many of which contain a distressed single color, perfect for cutting titles on the Cameo. I used Bebas Neue font. I like adding some smaller letters/numbers for visual interest.


Here's the embellishment cluster. The compass I punched out of a brag book card.

The layout of the filler pages follow the same design:


You'll notice I used the same design on the title page as I did on the first page of the filler pages. The opposing page I did a photo collage. In my first vacation album, I printed all the photos in 4x6, then trimmed them into a collage. Here's why I'm behind in vacation albums: I decided, since I'm adept at PSE, I should just make a collage in Photoshop Elements. And so I did. I used an 8.5x11 canvas with a 1/2 inch border on each side. I opened the photos I wanted to include, created a collage to fit all the photos in various sizes and orientation, and inserted the photos into the collage. Then I print the photos on Persnickety Prints. I still have about 8 two-page layouts to make, but as you can see, it won't take much time but will still look attractive.

Thank you for viewing my album! I hope it gives you ideas for how you might scrap big events like vacations and make it manageable.

Sunday, May 26, 2013

Geek girl scrapbooking

This past year I decided to just own up to how much of a geek I am. I love space movies, comic book heroes, and supernatural thrillers. I love Star Wars, Star Trek, Buffy the Vampire Slayer, the Avengers, and Supernatural, among others. My license plate says DETH STR. My avatar is Buffy fan or Buffyfanlarson. I am a geek, and with that I'm OK.

Here's two pages I made recently celebrating the geekiness in our house:


This two page layout I thought of when I got new plates for my car. They still say DETH STR, but we have kept all the old plates from our past spaceships automobiles. Seeing them lined up made me think to take photos of all other Star Wars gear in our house and make a page. (Well, not ALL the Star Wars stuff, but some.)

Here's some details:


On the details above you can see how I stamped and embossed a line of triangles, then painted inside some, just for a little color.


More paint, this time with old chipboard letters.


I also made this page recently:


I got the idea for this page from a pin on Pinterest. I could never find the sign to buy--it always linked back to Tumblr--so I used the sign as the journaling for this page.


I had a lot of fun mixing patterns and colors from the Studio Calico kit I used--February, maybe?--and loved how perfect the background paper looked with this theme. And the Pantone color of the year--emerald green--is perfect for the page, especially matched with the orange and red.

More details:


I made the title with my Cameo, as I did with the last page. I liked layering two different colors for a little more depth in the title.

Thank you for sharing my geekiness with me. Tell me: are you as much of a geek as I am? :-)