Finish creating the boys' 5th and 6th grade school album pages- Edit and print photos from Custer S.P. (2011)
Create mini albums with thank you cards from school- Finish the Disney album (2010)
Update the Easter mini-album- Complete the iScrap class/album
Complete the Get Messy class/album- Ask Derick to finish journaling his London album
Complete 5 Vacation Faves (2015)- Create cards for my Dad
- Rowan school album photos: 3rd, 5th, and 6th; class photo 4th and 6th
- Dominic school album photos: 2nd, 4th, and 5th;class photo 3rd and 5th
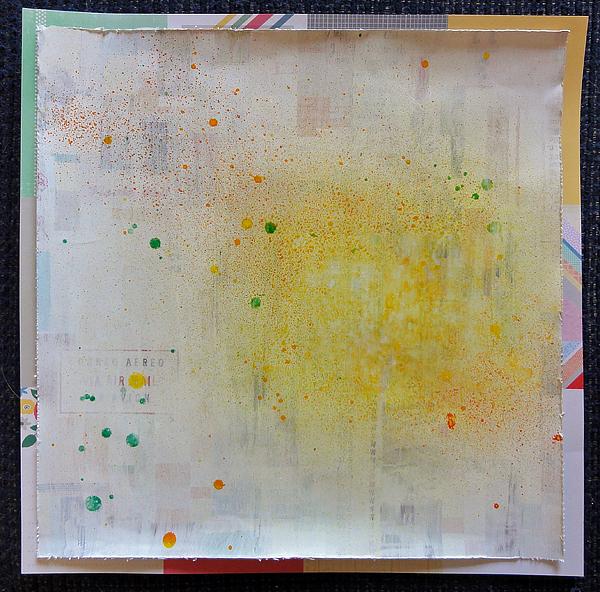
I decided to kill two birds with one stone and use the mini-album from the Get Messy class for my 5 Vacation Faves album this year. Here's the cover:

I had gesso'd the cover a long time ago and finally got around to using a mask and modeling paste, punches, more gesso, and mist to finish it up. Here's the back cover:

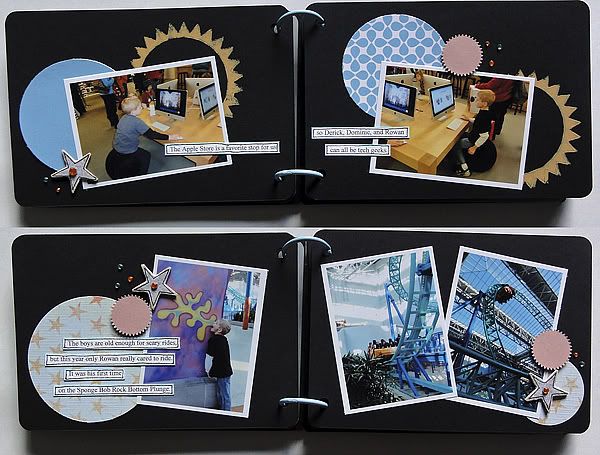
I finished the lessons in the class--there were about 7--to do the internal pages for each family member. Here's the inside pages:


The font I used up here on the right is a nice one I should use more often called "Wolf in the City."

Most of the products I used came with a kit I bought with the class. I also used stuff lying around, like some journaling cards cut from patterned paper from Shimelle's first collection, I think.


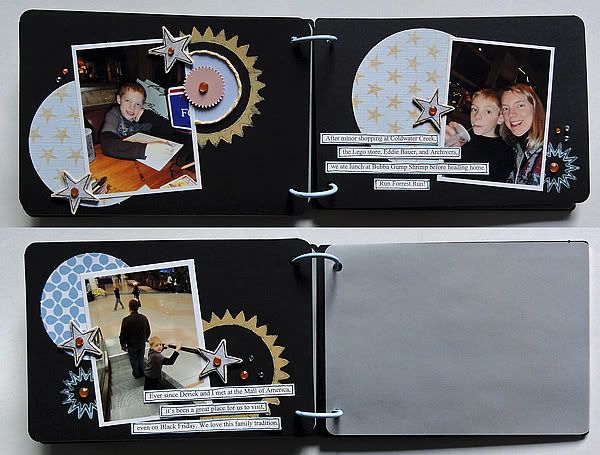
More modeling paste and a different way to mist.


This is maybe the one part of the project I may change. We had to create a pocket with vellum and confetti punches, so I did it with my son's picture. I think it would have looked better with a photo where he was occupying more of the frame. As a result, I may add another photo of him somewhere, maybe by adding another page.

Another note about the pocket page: I put this flair on the inside of the pocket and it didn't look good, so I cut it out and adhered it on the outside, adding the number sticker to cover the cut.

This might be my favorite page spread. I stamped with a couple texture square stamps in different colors to make a photo mat. Not in the class lesson, just an idea I got.

Thank you for checking out my mini-album! I am so happy with it, even though it isn't what I typically do. The class is no longer available, but you might check out Studio Calico and ask; they do seem to bring it back or offer updated versions.
(One final confession: I technically haven't finished the class yet. I haven't done the photo transfer--there were three techniques taught--because I wasn't sure how I wanted to use them. Now I have three ideas, two for this mini-album and one for scrapbook page, so I should finish that lesson (and therefore the class) shortly. I'll share those when I get done.)

I had gesso'd the cover a long time ago and finally got around to using a mask and modeling paste, punches, more gesso, and mist to finish it up. Here's the back cover:

I finished the lessons in the class--there were about 7--to do the internal pages for each family member. Here's the inside pages:


The font I used up here on the right is a nice one I should use more often called "Wolf in the City."

Most of the products I used came with a kit I bought with the class. I also used stuff lying around, like some journaling cards cut from patterned paper from Shimelle's first collection, I think.


More modeling paste and a different way to mist.


This is maybe the one part of the project I may change. We had to create a pocket with vellum and confetti punches, so I did it with my son's picture. I think it would have looked better with a photo where he was occupying more of the frame. As a result, I may add another photo of him somewhere, maybe by adding another page.

Another note about the pocket page: I put this flair on the inside of the pocket and it didn't look good, so I cut it out and adhered it on the outside, adding the number sticker to cover the cut.

This might be my favorite page spread. I stamped with a couple texture square stamps in different colors to make a photo mat. Not in the class lesson, just an idea I got.

Thank you for checking out my mini-album! I am so happy with it, even though it isn't what I typically do. The class is no longer available, but you might check out Studio Calico and ask; they do seem to bring it back or offer updated versions.
(One final confession: I technically haven't finished the class yet. I haven't done the photo transfer--there were three techniques taught--because I wasn't sure how I wanted to use them. Now I have three ideas, two for this mini-album and one for scrapbook page, so I should finish that lesson (and therefore the class) shortly. I'll share those when I get done.)


